Understanding the Risks of Radon in Crawl Space
When we think about radon, most of us picture a finished basement or a first-floor living area. But some of the most stubborn radon problems live in places we rarely see: the crawl space. A crawl space sits right between your home and the soil below. That soil is the source of radon, a radioactive gas that forms naturally when uranium in the ground breaks down. If your crawl space is unsealed or poorly ventilated, it can become a direct pipeline for radon to move into your living areas. Over the years, I have seen many homeowners in St. Louis dismiss their crawl space as just an awkward storage spot. In reality, it is often the primary entry point for soil gas, and ignoring it can lead to elevated radon health risks throughout the whole house.
Why the Crawl Space Matters for Radon Entry
A crawl space is essentially a shallow basement with limited headroom. The floor is usually bare earth, gravel, or a thin layer of concrete that has cracked over time. Radon moves through the soil by pressure and diffusion. When your house is warmer inside than the ground outside, it creates a slight vacuum that pulls soil gas up through the foundation. The crawl space floor is porous, so radon enters freely. From there, it seeps through floor joists, plumbing chases, and electrical openings into the main living space. I have measured radon levels in crawl spaces that were ten times higher than the levels in the finished rooms above. That is the kind of number that makes you realize why addressing the crawl space is not optional.
One of the most common mistakes people make is thinking that a radon test placed on the first floor tells the full story. It does not. A radon test in the living area might show a moderate reading, while the crawl space underneath is saturated with radon. The gas moves through the house in complicated ways, and the crawl space acts as a reservoir. If you want to bring the whole house level down, you have to stop the source. That means dealing with radon in crawl space directly. It is not a side issue; it is often the main event.
How Radon Mitigation Works in a Crawl Space
The most effective technique for crawl spaces is active soil depressurization, also known as sub-slab depressurization when applied to a concrete slab. In a crawl space with a dirt floor, the approach is similar but requires some adaptation. The goal is to create negative pressure under the vapor barrier by pulling soil gas out through a pipe and venting it above the roof. A radon fan, typically installed outside or in the attic, provides the suction. The fan runs continuously, which means the system must be built to last and be monitored over time.
Before installing anything, the crawl space needs preparation. The first step is covering the exposed soil with a polyethylene vapor barrier. This is not the thin painter's plastic you buy at the hardware store. We use heavy-duty, six-mil or thicker polyethylene, properly overlapped and sealed at the seams with caulking or tape. The barrier must extend up the crawl space walls by at least six inches and be sealed to the foundation. Any openings around pipes or posts must be sealed as well. If there is a sealed sump hole or a floor drain, that also needs attention. I once worked on a house where the crawl space had an old sump pit that was open to the soil. The radon levels in that pit were off the charts. Sealing it with a gasketed cover and connecting it to the suction system brought the whole house level down by more than half.
Once the barrier is in place, we install a suction point. This is usually a perforated pipe laid on top of the soil, under the vapor barrier, connected to a vertical riser that goes through the barrier and up to the radon fan. The fan creates active soil depressurization, reversing the natural pressure gradient so that soil gas is pulled away from the house instead of toward it. After installation, a post-installation verification is critical. We place a radon detector in the crawl space and in the living area to confirm that the system is actually working. A manometer, often a U-tube manometer, is installed on the riser pipe so the homeowner can see at a glance that the fan is running and the system is maintaining negative pressure. If the manometer shows zero, something is wrong, and it is time to call a professional.
Common Challenges with Crawl Space Mitigation
Crawl spaces present unique difficulties. Access is limited, and the working conditions can be cramped, dusty, and uncomfortable. The vapor barrier must be installed carefully to avoid tears, and every seam must be sealed. If the crawl space has standing water or high humidity, that adds another layer of complexity. Moisture can degrade the vapor barrier and reduce the effectiveness of the sealant. In those cases, foundation repair or drainage improvements may be needed before the radon system can be installed. I have seen homeowners try to skip the barrier and just run a suction pipe in the middle of the dirt floor. That approach rarely works because the soil gas finds other routes into the crawl space. The barrier is not optional.
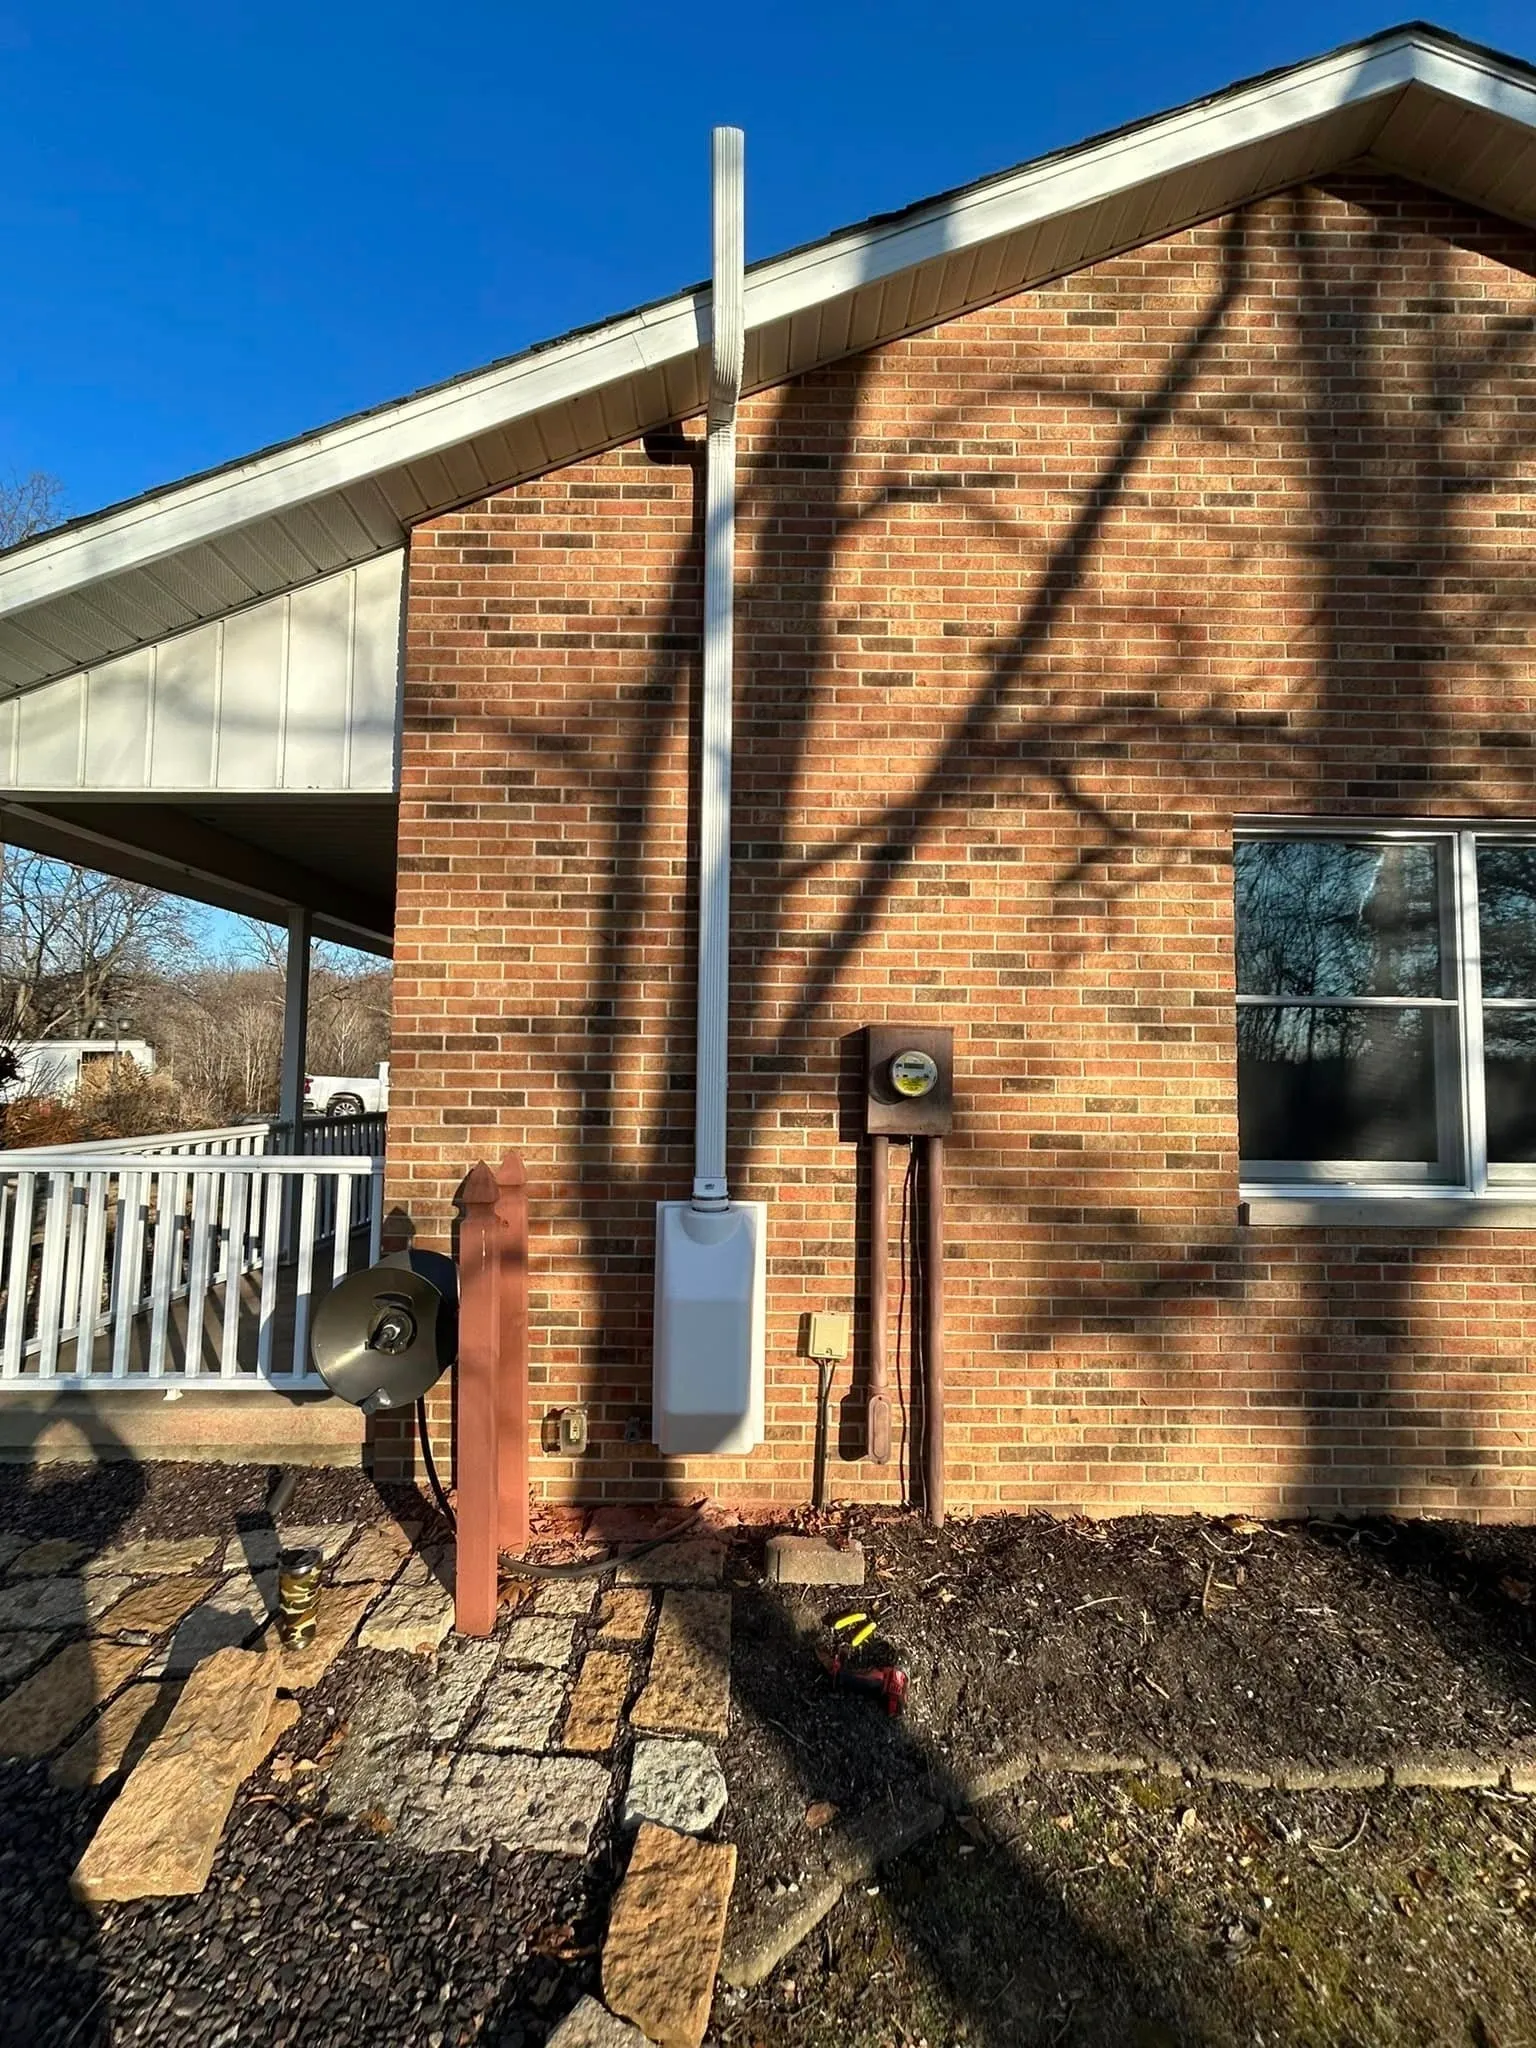
Another challenge is the radon fan location. In a crawl space, the fan cannot be placed inside the conditioned space because it would create a noise and safety issue. The fan is usually mounted on the exterior wall or in the attic. The pipe runs from the crawl space up the exterior of the house, and the fan pulls the gas out before it can enter the living area. The exhaust must be above the roof line and at least ten feet from any windows or doors. This is not just a best practice; it is part of the EPA guidelines that many jurisdictions follow. In St. Louis, local building codes may have specific requirements, and a good mitigation contractor will know them.
Maintenance and Long-Term Monitoring
A radon mitigation system is built to run for years, but it is not maintenance-free. The radon fan has a lifespan of five to ten years, depending on the model and operating conditions. The U-tube manometer should be checked monthly. If the fluid levels change or the manometer shows zero pressure difference, the fan may have failed or the pipe may be blocked. I recommend that homeowners keep a log of their manometer readings and schedule a professional inspection every two or three years. Some companies, including Air Sense Environmental, offer a mitigation system warranty that covers parts and labor for a set period. That kind of warranty gives peace of mind, especially if you are dealing with radon in crawl space that has been stubborn to fix.
Post-installation verification is not a one-time event. Even after the system is running, seasonal changes can affect radon levels. A dry summer might show low readings, but a wet spring can change the soil pressure and bring levels back up. I tell people to run a radon test every two years, or after any major foundation work or remodeling. If you see a spike, call your mitigation company. They can check the manometer, inspect the vapor barrier, and make adjustments.
Is It Worth the Investment?
Some homeowners hesitate because of the cost. Crawl space mitigation can be more expensive than a standard sub-slab depressurization in a basement, because of the labor and materials involved. But the alternative is living with elevated radon levels, which the EPA and most health authorities agree is the second leading cause of lung cancer after smoking. The radon health risk is real, and it is cumulative. The money spent on a properly designed and installed system is an investment in your family's health and your home's value. When you sell the house, having a documented mitigation system with a post-installation verification report is a strong selling point. Buyers are becoming more aware of radon, and a clean bill of health can remove a major negotiating hurdle.
In my experience, the worst cases are the ones where someone tried to fix the problem themselves with a box fan and some plastic sheeting. That approach rarely works and can even make things worse by pressurizing the crawl space and pushing radon into the living area. Professional radon mitigation is not just about buying the right equipment; it is about understanding the airflow dynamics of the house and the soil. Companies like Air Sense Environmental in St. Louis have the tools and experience to do it right. They use calibrated radon detectors, manometers, and proper sealing techniques. They also stand behind their work with a mitigation system warranty, which is something a DIY job cannot offer.
Final Thoughts
If you have a crawl space and you have never tested for radon, start there. A simple radon test kit costs around twenty dollars and takes three to seven days. If the result is above four picocuries per liter, which is the EPA action level, you need a mitigation plan. Do not assume that a low reading on the main floor means the crawl space is safe. The only way to know for sure is to test the crawl space itself. And if the levels are high, call a professional who specializes in radon mitigation. Crawl spaces are tricky, but they are fixable. With a polyethylene vapor barrier, a sealed suction point, a reliable radon fan, and a manometer to monitor it, you can bring the radon levels down to a safe range. The key is to treat the crawl space not as an afterthought, but as the critical zone it really is.